
To take car photos for sale, wash the car, park it in open space on a bright overcast day, and shoot a fixed set of angles at headlight height, starting with the front three-quarter view. Add interior shots and honest close-ups of any damage. Then replace distracting backgrounds, like other cars, buildings and signs, with a clean, neutral one so every listing looks consistent.
Buyers scroll past dozens of cars before they click one. The photos are the first and often only thing they judge you on. A well-photographed car looks cared for, and that’s what gets the message or the test drive.
Prep the car first
- Wash and dry it. Water spots and dust show up badly in photos, especially on dark paint.
- Clean the glass inside and out. Smudges catch light.
- Empty the interior. Phone mounts, chargers, air fresheners, papers in the door pockets. Vacuum the mats.
- Plates: some sellers cover or blur them for privacy, and some listing sites have rules about it. Check where you’re posting.
- Find space around the car. At least a car length on every side, so you can step back for the full shots.
The shot list
Shoot the same angles in the same order for every car. Buyers compare listings side by side, and a consistent set makes your cars easy to compare, which helps them pick yours.
| Shot | How | Why it matters |
|---|---|---|
| Front three-quarter | Stand at a front corner; turn the wheels slightly so the rim faces you. | The lead photo. Shows the face and the side at once. |
| Side profile | Straight on, whole car in frame, camera level with the middle of the doors. | Shows proportions and the condition along the side. |
| Rear three-quarter | Same as the front, from a rear corner. | Completes the walk-around. |
| Front and rear | Straight on, centered. | Bumpers, lights, plates (or covers). |
| Dashboard and odometer | From the back seat, engine on so the display lights up. | Mileage and warning lights: buyers look for both. |
| Front and rear seats | Through the open doors, wide. | Wear on the driver’s seat says a lot. |
| Trunk and engine bay | Open, light falling in. | Space, cleanliness, no leaks. |
| Wheels and tires | Close, one per corner if they differ. | Tread and curb rash. |
| Damage | Close-up plus a wider shot showing where it is. | Honesty builds trust and saves wasted viewings. |
Car photography tips: light and camera position
Light. A bright overcast sky is ideal: soft light, no hard reflections, colors that look true. On sunny days, shoot early in the morning or late in the afternoon, and keep the sun behind you. Midday sun puts harsh reflections on the paint and deep shadows under the car. Avoid parking under trees, which throw blotchy shadows that stay on the paint even after the background is replaced.
Height. Hold the camera at about headlight height for exterior shots. Shooting from standing eye level looks down on the car and makes it look smaller. Crouch a little.
Lens. Use the phone’s main camera, step back and zoom in slightly (2x). The ultra-wide lens distorts cars badly near the edges of the frame.
Space. Leave room around the car in every exterior shot. The AI can’t add a bumper the frame cut off, and a little space makes it easier to place the car on a new background later.
Replacing the background
Most cars are photographed where they’re parked: a lot full of other cars, a street with houses, a driveway with bins. You can’t always move them, but you can remove what’s behind them.
- 1
Upload the exterior shots
Up to 10 at a time, so a full walk-around fits in one batch. Backgrounds come off automatically.
- 2
Pick one backdrop for everything
A light gray or soft white gradient suits most cars and never looks fake. Or upload a photo of your showroom or a branded backdrop under Background, Photo.
- 3
Ground the car with a shadow
Under Background, then Blur, the Shadow slider adds a soft shadow so the car sits on the ground instead of floating.
- 4
Check the windows
What’s visible through the glass usually stays, because the AI treats the windows as part of the car. Normally that’s the interior. If a building shows through, take it out with the Erase brush.
- 5
Download JPGs
Smaller files, faster uploads to listing sites, same look.
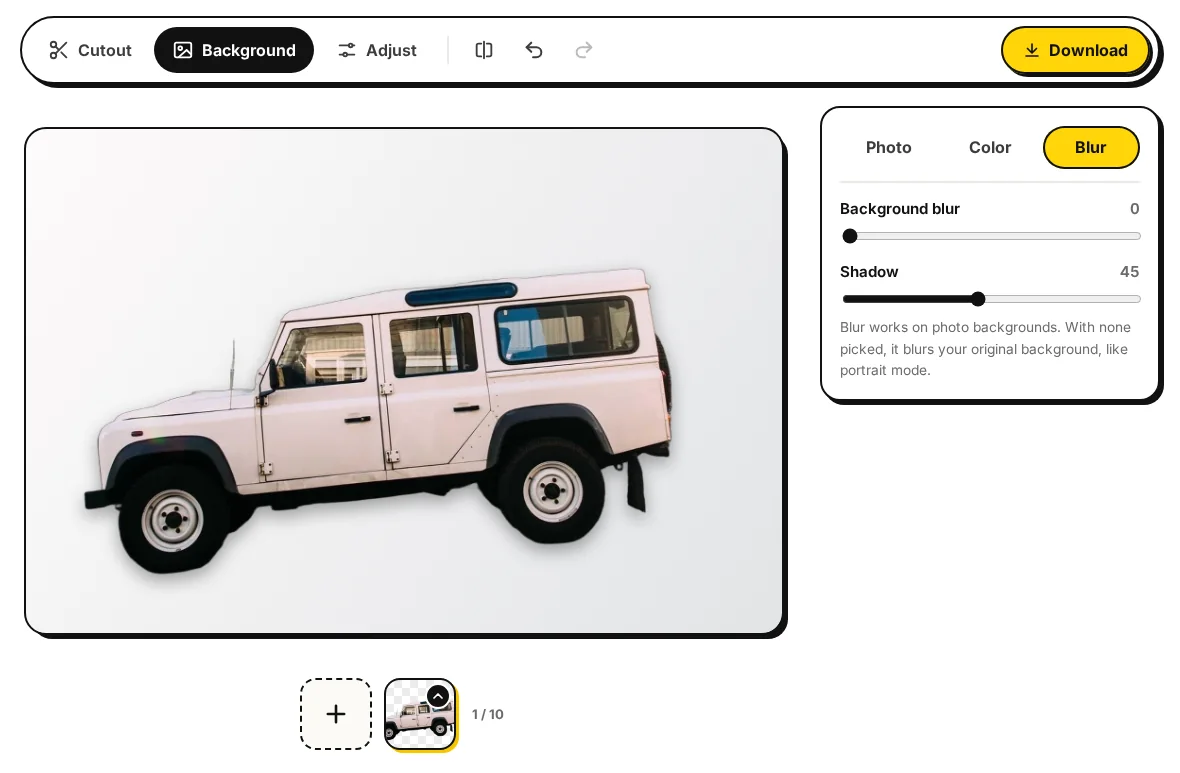
Leave the background as it is on interior and detail shots. Replacing it there doesn’t help, and buyers expect to see the real thing.
Show the car as it is
Background replacement changes the setting, not the car. Don’t retouch scratches, dents, rust or worn seats; photograph them clearly instead. A buyer who finds an undisclosed dent at the viewing walks away and tells others. A buyer who saw it in the photos and still came is close to a sale. If you edit anything beyond the background, like brightness on a dark interior shot, keep it modest so colors stay true.
Mistakes that cost clicks
- A dark or blurry lead photo. The first image does most of the work in search results. If it’s weak, buyers never see the rest.
- Only three or four photos. Fewer photos read as “something to hide”. Buyers would rather scroll through 25 than drive out to see what you left out.
- Reflections of the photographer. Glossy paint is a mirror. Step to the side a little, or wear dark clothes.
- Portrait orientation for exterior shots. Cars are wide. Listing sites display landscape images larger.
- Inconsistent order. If every listing starts with a different angle, your inventory page looks random.
- Heavy filters. Boosted saturation changes the paint color, and buyers notice when the car in front of them looks different.
Doing this for a whole lot
Dealers get the most out of consistency. Use the same backdrop, the same shot list and the same shadow strength for every vehicle, and your inventory page starts to look like a catalog rather than a collection of snapshots. The page for car dealers covers that workflow, and multiple images explains how batches work.